Showing posts with label food. Show all posts

September 20, 2014

How to harvest cinnamon

Our lopsided cinnamon tree after pruning
(It was more lopsided before)

We have a big cinnamon tree that we planted about 9 years ago. It was about 12 inches tall (30 cm) and cost around a dollar when we planted it. Cinnamomom zeylanicum (Ceylon cinnamon or true cinnamon) is a beautiful shade tree with small, dark, glossy leaves.
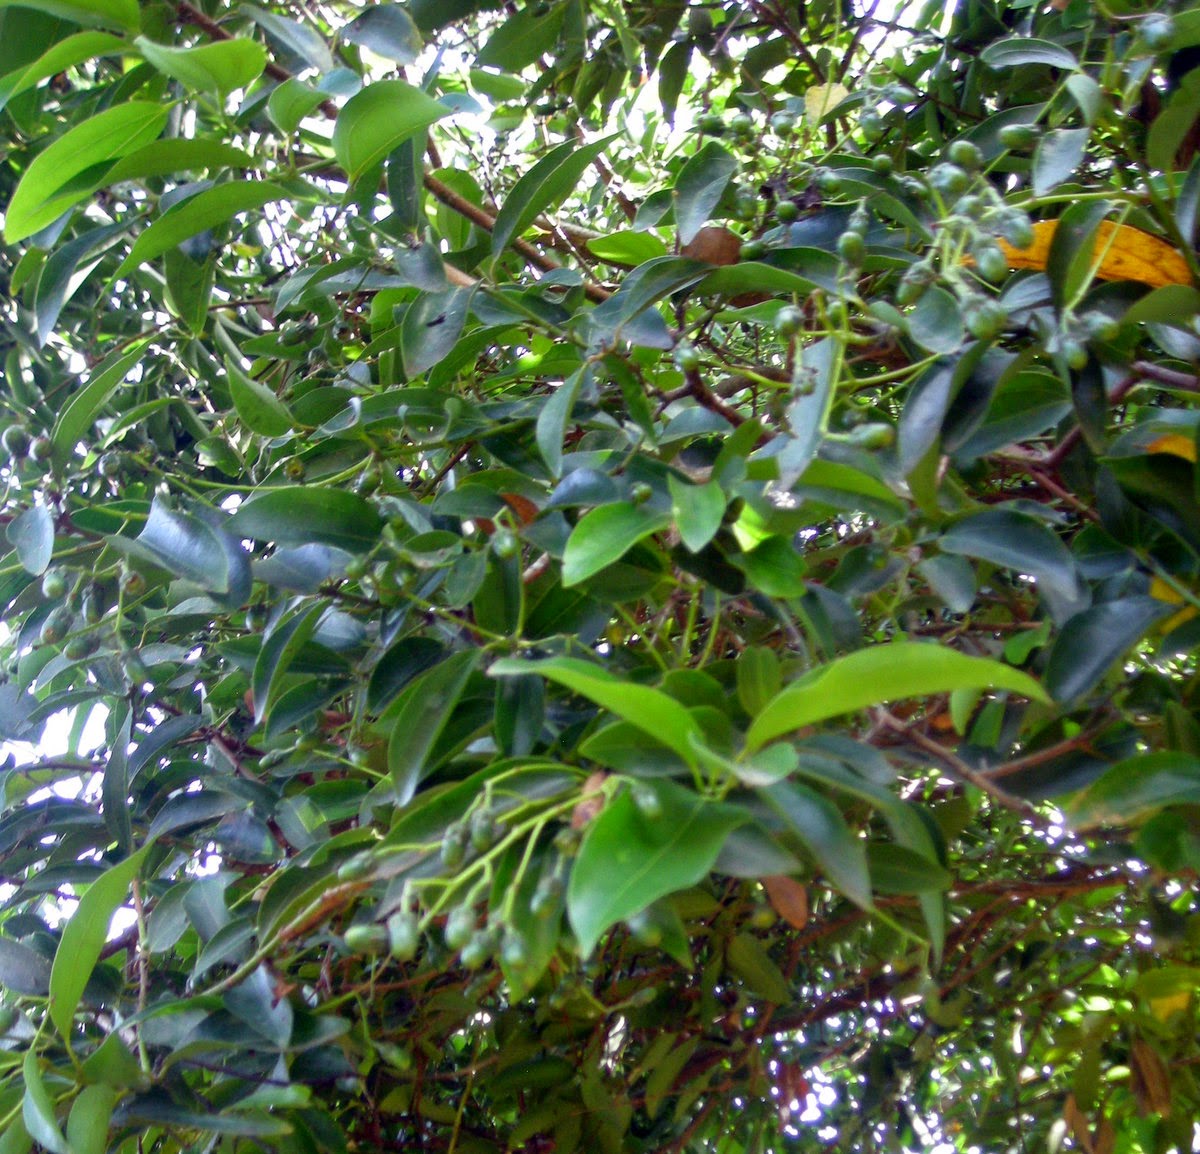
See the little berries towards the bottom
It blooms once a year with white flower clusters, followed by small, acorn-shaped 'berries' (terrible tasting – don't try them!). Tender new growth sometimes has a pinkish hue.

Even if you aren't interested in harvesting the spice, I highly recommend this attractive tree as an ornamental shade tree in your tropical garden. CURLA (north coast Honduran agricultural university) recommends that it be grown below 500 meters altitude, though it can be grown up to 1,000 meters (3,200 feet). Cinnamon trees can grow to 10-15 meters in height (~30-45 feet).

Tree at about 1 1/2 years (Nov. 2006)
Cinnamon needs to be grown in tropical climates where temperatures are mostly in the 27-30°C (80°-86°F) range and the rainfall is heavy, 1,500-4,500 mm per year (~60-180 inches). It does not like prolonged dry periods. Be careful where you purchase the tree, though, as my CURLA tropical fruit book mentions that the trees grown from seed in the Lancetilla botanical garden are subject to fungal problems. CURLA propagates from cuttings of a Puerto Rican variety which doesn't have problems with fungus or insects on the north coast.

We've trimmed the tree several times to remove low hanging branches and to try to correct its lopsidedness. This was caused by dog damage, overcrowding, and rainy season neglect when it was young. The tree generally has a very nice shape which doesn't require much, if any, pruning. Trimming emits the most wonderful smell of cinnamon (canela in Spanish), as does crunching up a leaf. I always wanted to harvest the cinnamon but didn't know how. (We didn't have internet for several years.) This time I searched until I found some information that made it clearer how it was done so we decided to give it a go.

How the professionals do it

On cinnamon plantations, I've read that they allow the young tree to grow for 3-6 years until it is 2-3 meters tall (~6-10 feet) and then cut it back a few inches above the ground. This allows multiple new stems to shoot up. The cinnamon can be harvested from this first cutting. The new stems are allowed to grow for 2-3 more years and then the cinnamon is harvested by cutting the stems almost to the ground again. In this manner, the individual plantings can be kept going for many years. There is the added benefit of having long, straight, mostly branchless stems from which to harvest the cinnamon. I may try that with some of the many seedlings that pop up under the tree every year.

The best time for harvesting cinnamon is right after the rainy season, but not while the ground is saturated. Unfortunately, we trimmed this tree right before the rainy season, so we soaked the wood overnight. This supposedly is to make the bark easier to remove, though we aren't sure if it made much difference. I'll skip this step next time unless the bark proves hard to remove.

The recommended sizes for harvesting the cinnamon are branches or stems with diameters from 1.2 to 5 cm (about 1/2 to 2 inches). Smaller diameter branches don't have a thick enough layer of cinnamon and larger branches are used for making cinnamon oil because the cinnamon will be bitter.

The harvesting process

First, any leaves and small twiggy branches shooting off the branch that you are going to use should be removed. Unless you are a pro, you'll probably want to cut the branch into shorter, easier to handle pieces. Around 60 cm (24 inches) worked well for us.

Then the dark outer bark is scraped off being careful to remove it all but not to scrape into the thin orange cinnamon layer. A paint scraper worked well for this. Initially, the cinnamon may appear yellow, but after exposed to the air for awhile, it will be more orange.

Next the branch is firmly rubbed all over to loosen the cinnamon layer from the wood. We just used a short piece of wood to rub the cinnamon layer but in Ceylon they apparently use a special tool, a brass rod. It was mentioned that you shouldn't use any other type metal for the rubbing as it can darken the cinnamon.

A long lengthwise cut is made through the cinnamon layer with a sharp stainless steel knife and one or more cuts are scored around the circumference of the branch, depending upon the section length you feel comfortable working with. Ceylon professionals cut the entire length of 1-2 meter branches into one piece of cinnamon, but being beginners, and not having long straight twigless branches like they grow specifically for this purpose, we had better luck sectioning the cinnamon into about 4-5 inch cinnamon stick-sized pieces. 'Knots' from side branches make it more difficult to remove the cinnamon in large sections.

After scoring the sections, begin to carefully pry up the cinnamon layer in as big a piece as you can with a knife or metal spatula. With practice, you'll be able to remove most sections in one piece. The cinnamon will quickly start curling up into a cinnamon stick as it dries. A few pieces can be rolled together or a big piece can be filled with the smaller scraps of cinnamon to make cinnamon sticks.

The sticks needs to thoroughly dry in the shade for about a week. Sun will leach out the flavor. I also put the cinnamon sticks in a barely warm, turned off oven to help them along since we have such high humidity here. Wow! Did my kitchen smell good!

After it was dried, I ground some cinnamon in a coffee grinder. I had to do it several times to get all the chunks out, but eventually I ended up with a jar of finely ground cinnamon. I put the rest of the sticks in a glass jar. I use the sticks for cinnamon tea, a new favorite of mine.

It's a lot easier to show than tell, so here is a video that our part time garden helper Ever helped me to make. He did a great job explaining.


Watch my video on YouTube if it is not showing above.


This turned into quite a popular project, with some neighborhood kids coming to learn how and Yamileth, my housekeeper, getting enthused about helping, too. She told me that her neighborhood pulperia charges three lempiras for a very tiny piece of canela about two inches long. The boys told me their mom was going to make arroz con leche (rice with milk, sort of a rice pudding) with some of their cinnamon. We all have enough cinnamon to last a long time. The boys have since come back to get some of the seedlings to try to grow their own cinnamon trees.

This was also a very 'green' project. We accomplished trimming the tree, used the small twigs and leaves in the compost, harvested enough cinnamon for workers and friends, and gave the left over wood to a poor man who sells leña (firewood) to those who still cook with wood stoves. No waste at all.

Soaking the branches might have removed some of the cinnamon flavor. The soaking water certainly turned into cinnamon tea. But my sister-in-law says that it takes much less of our cinnamon to make tea than it does the cinnamon she's bought in La Ceiba before, so I'm not sure. We have some more trimming to do where the tree is hanging over the fence but I'm going to wait until after rainy season next spring as recommended. It will be interesting to see if the flavor is any different next time.

Uses

This cinnamon is very sweet and mild, which was really good in iced coffee and made a great flavored cinnamon ice cream. I've used it in cinnamon bread, cookies, and a few other recipes. I used a little more than I do with store bought cinnamon, which has a harsher flavor.

Besides a cooking spice, cinnamon tea has been used in home remedies for thousands of years but has recently become very popular as a means to aid weight loss, blood sugar control, stomach upsets, and other health concerns. Scientific studies sometimes disagree, but users swear by it.

Two varieties of cinnamon

Less expensive Cassia cinnamon is more often found in US grocery stores, though you can get Ceylon cinnamon (true cinnamon) in specialty stores and online. Cassia is stronger flavored and is considered a less desirable cinnamon. Some people even consider it unhealthy because it has much higher levels of coumarin, which can cause liver damage.

Image from Cinnamon Vogue
Ground cinnamon will generally be labeled as to the type but other ways you can tell which type you have is that Ceylon cinnamon is lighter colored, more of a golden or oranish brown, while Cassia cinnamon is dark, reddish brown. In stick form, Cassia is much thicker and the stick usually consists of one layer, hollow inside. Ceylon sticks may consist of several thinner layers or small pieces rolled up inside like a cigar. You can break the Ceylon cinnamon sticks and cannot break the Cassia. 80% of the world's Ceylon cinnamon still comes from Sri Lanka, formerly called Ceylon. Indonesian, Vietnamese, and Chinese cinnamon are all forms of the cheaper Cassia cinnamon.

If you buy a tree, make sure that you get true cinnamon, Cinnamomum zeylanicum. I believe it is still sold at CURLA here in La Ceiba. You might consider buying two, one for growing a shade tree and one for harvesting the spice. That way you can have the best of both worlds: a beautiful shade tree and your own small cinnamon plantation.

More cinnamon info

To see how Ceylon professionals harvest cinnamon, check out this beautiful video, The Cinnamon Story. They are amazing! This man was getting cinnamon pieces at least 1-2 meters long. In the last part of this video, they are making cinnamon oil. There is no 'cooking' involved in harvesting the spice, though drying ovens or rooms are used to speed the drying process on cinnamon plantations.

For everything you ever wanted to know about cinnamon, check out Cinnamon Vogue.

April 24, 2013

No rice with potatoes!

Honduran food
Rice and potatoes?

"You're ordering rice and potatoes?"

"Sure, why not?"

"Because you just don't. You don't eat rice with potatoes. That's two starches. It's not allowed!"

"Whatever. It's good. You should try it."

Honduran pastelito
Honduran chicken pastelito
Actually, I have tried it. There is no way around it. Yummy pastelitos (fried meat pies) often come with rice and potatoes inside. So do many tamales, including the ones I make.

April 8, 2013

Pizza grilling tips

Grilled pizza
Makes me want to go make one right now!

See You must try grilled pizza for my basic grilled pizza instructions and then read on.

It is so much easier to figure new things out if you first see it done, no? That is always true for me. Thankfully in the internet age you can do that!

YouTube has some videos on grilling pizza that you might find helpful, especially for seeing what your cooked dough should look like. Steve Raichlen shows the appropriate enthusiasm for grilled pizza. (Ignore the lake of olive oil in which he stretches the dough – you really don't need that! A small amount of flour or oil on a pastry board will do.) This video by BBQ Pit Boys makes me laugh – a real man's guide to making grilled pizza (notice he uses a small machete to cut it). He tops the pizza dough before cooking, but I still suggest using the two step method of cooking the top first. BBQMyWay has another manly-man video – listen to the crackle! It's true. Ours crackles like that when we cut it. It is a beautiful sound.

grilled pizza
Click to enlarge these photos
If you don't have an outdoor grill, check out Laura Vitale's video on grilling pizza on a stove-top grill. If you are a homemade pizza virgin, Laura has another video that goes through the whole dough making, sauce, and baking process. Don't let making dough intimidate you. Pizza dough is much more forgiving than bread dough.

If you prefer Spanish, here's a video for you. This one includes preparing the dough. YouTube has other pizza a la parrilla videos in Spanish, too.

pizza cooked on the grillFor the grill, I recommend the two-step process rather than topping the raw dough at the beginning as some videos show. I think that you'll get a much crisper, more evenly cooked crust using the cook-turn-top-cook method. I also think it is easier for the beginner.

Watch a few of these videos and you'll see that there are no hard and fast rules for grilling pizza. It is an art, not a science.

El Jefe's tips

In discussing all of this with El Jefe, since he is the main pizza chef here, he pointed out that there are a lot of variables. Differences between grills is a big one. Another big variable is the thickness of the dough. He said that a thin crust will burn a lot faster than a thicker one, so you may need to use a slightly lower temperature if your crust is very thin.

jumbo grilled pizza
Square - for a change. Isn't it a beauty?
We haven't found it necessary to oil the grill grates or the dough disk before grilling, but you might want to oil your grates the first time if you aren't sure whether or not it will stick. Do make sure the grates are clean, though, as any bits of crud from your last barbecue will stick to the dough.

He also told me about other temperature adjustments he sometimes makes, but since that might only apply to those who have the same kind of grill that we do, I have another idea for beginners.

Make a small extra disk of dough from your same dough batch, stretched or rolled out to the same thickness as your pizza dough. Use that to test your grill temperature and cooking time. In the beginning, El Jefe oiled the grates before putting the dough on the grill but after a time he discovered that our well-used grill has developed a nice, shiny, non-stick coating from lots of use so he doesn't do that anymore. If your test crust sticks too badly, you can either oil the grates or oil the bottom of the dough before placing it on the grill. If it cooks too fast or too slow, adjust your grill temperature accordingly.

pizza dough ready to go
Keep it cool
One bit of advice from me is that a slightly firmer dough is easier to handle on the grill, though a soft dough is not impossible after you get some experience. If you live in a hot, humid tropical climate with an un-airconditioned kitchen, keep your dough cool after shaping. Cover it with a barely damp towel and/or plastic wrap and stick it in the fridge if you can't get it on the grill right away. The dough will be easier to handle when cool. We find this particularly true for doughs containing sourdough starter.

More tips on grilling pizza

Here are some quick tips Chef Jefe and I (the dough lady) can give you based on our experiences:

Tip #1 - Don't let the shaped dough stick to your peel or baking sheet. Use lots of corn meal, semolina flour, or regular flour on your transfer device. On smaller pizzas or if the dough is being fussy, sometimes we just pick the untopped disk up from the pastry board with our hands and drop it onto the grill. Use care if you try that.

Tip #2 - Don't go too big. Until you get the hang of manipulating the dough onto the grill, two medium to small pizzas are much easier to handle than one big one. Similarly, don't go too heavy on the toppings.

Tip #3 - Give it a rest. If you are having trouble rolling or stretching your dough, give it a rest for 5 or 10 minutes and then continue shaping. Dough springing back is a sure sign that the gluten needs to rest again. Be sure to cover it with a damp towel or plastic wrap so that it doesn't dry out during its nap.

grilled pizza
Honduras-shaped pizza (not intentional)
Tip #4 - Live with less than perfect circles. When the dough slides off the peel to the grill, it tends to stick to the hot grates of the grill and get somewhat misshapen. Unless you are very lucky, you won't be able to push/pull it back into shape before the dough sets. Just remember, if it isn't a perfectly round Pizza Hut pizza, it is a 'rustic' or 'artisan' pizza which makes it even more valued.

pizza ingredients
Be prepared
Tip #5 - Be prepared. Have all of the toppings ingredients and implements ready to go grillside before you put the dough on the grill. There really is no time to go searching for something in the kitchen once you have put the dough on the grill.

Tip #6 - Don't go anywhere. Your dough should only need about 2 to 4 minutes on the first side. If it takes longer, that means that your grill was not hot enough. Grills are not as accurately temperature controlled as an oven, especially if it is a charcoal grill. The crust will miraculously tell you when it is ready to turn: if the dough sticks to the grates, it isn't ready so don't force it. As the dough cooks, the grates will release the dough so it's easy to check the bottom for doneness.

Tip #7 - Know your hot spots. If your grill has hot spots, be sure to avoid them if possible. Rotate the pizza once on each side so your crust cooks evenly and doesn't have burned spots. You can rotate more often, but remember that every time the grill is opened, it will be losing heat.

Tip #8 - Import your pizza flour from Italy and use only San Marzano tomatoes, which grow on the volcanic plains to the south of Mount Vesuvius, and mozzarella di bufala Campana, made with the milk from water buffalo raised in a semi-wild state in the marshlands of Campania. -- Just kidding! (That is actual advice that I read somewhere.)

grilled pizza
Grilled meat-lovers pizza
Can you tell who was manning the meatball bowl?

~~~~~~~~~~~~~~

I want all my friends to try grilled pizza! I highly recommend it. I'm pretty sure that once you've tried pizza on the grill, you'll never go back either. I'd love to hear your experience if you try it. Please come back here to tell us about it. And if you have any questions that you think that El Jefe or I might answer, please feel free to ask away in the comment section below.

You must try grilled pizza

Grilled Pizza
Grilled Pizza - It couldn't be better

Grilled pizza? Who knew? Not me. I didn't see how it was possible to bake a pizza on a barbecue grill. Wouldn't the dough fall through the grates? Wouldn't it burn to a crisp? In looking for the perfect pizza dough (more on that below), I kept running across people raving about grilled pizza. Apparently it is the next best thing to having your own wood fired brick pizza oven.

Grilled meatball pizza
Meatball pizza - click to enlarge
El Jefe thought I was kidding when I suggested we try it. "Pizza on the grill? Are you sure?" "No, but let's try it anyway." We are converts now. I don't think I would ever bake a pizza in the oven again. There is just no comparison of the taste and texture of a grilled pizza versus home oven baked or even pizza chain pizza. Really. You just have to try it to see for yourself. Another interesting thing is that I've always liked thick crust pizzas, but now I prefer a crispy thinner crust.

I'm not going to give a pizza dough recipe. There are so many recipes out there that claim to be the 'perfect' dough so just try some and see what suits your fancy. One that I like is the recipe that came with my Zojirushi bread maker, but I've tried several different recipes and they all turned out great on the grill, each a little different in taste and texture. I sometimes set aside a portion of dough from my sourdough bread recipes to use as pizza crust. If I come up with a recipe that stands out over the others, I'll post it. In the meantime, I'm enjoying experimenting with different dough recipes. I've read that in the US, you can buy prepared pizza dough in a bag at the grocery stores and that it is good, too. The one thing you won't want to use is a pre-baked crust.

Almost as fast as take-out pizza

Most pizza dough recipes make two crusts or more, or a larger pizza than we need for two of us, so after the first rise, I freeze the extra dough in disks in resealable sandwich baggies sprayed with a little cooking spray inside. Then I put those bags into in a freezer bag. Just pull out a baggie of dough and let it thaw in the fridge overnight if you have time or leave it on the counter at room temperature for spur of the moment pizza. For the size we use (usually about 10-12 oz. of dough), it usually thaws within a couple of hours. I get panicky when my pizza dough stash gets down to one ball.

grilled pizza ingredients
Thawing the frozen stuff
You can also store any extra dough in the fridge for three days or maybe up to a week some say. Refrigerating the dough for at least a day or two adds to the depth of flavor. If you do that, be sure to oil the dough and wrap it well so that it doesn't dry out. Freezing the dough doesn't alter its quality at all. Don't get too carried away though. Plan on using the frozen dough within a month or two for best results, especially if you are in a country with frequent power outages.

cooking pizza sauce
Tomatoes, onions, garlic mostly
Speaking of freezer stashes, we've gotten so organized that we really can have pizza at the spur of the moment with freezer stashed pizza-sized batches of dough, sauce, pepperoni, meat balls, and grated cheeses (mozzarella and parmesan). I like to buy the big sticks of pepperoni and slice it with my Cuisinart. I think it is much cheaper that way.

pizza sauce
Quick whiz with the hand blender

I've made pizza sauce with a base of tomato puree, canned spaghetti sauce, fresh tomatoes, canned diced tomatoes, and every combination of those ingredients that I've had on hand. I usually saute garlic and onions, add Italian seasoning and a tiny pinch of cayenne pepper. Some people just use sieved canned tomatoes. It's all good. Depending upon your tomato source, you might want to add a teaspoon or two of sugar to combat the acidity. You will want a thick sauce so it doesn't make the crust soggy. Of course, you can make it really easy by buying prepared pizza sauce in a jar. It is even available in the major cities in Honduras, but it is more economical to make your own.

pizza sauce pureed
Ready to freeze
I usually make a large batch of sauce and freeze it in pizza sized amounts for quick pizzas. I pour serving-sized portions into custard cups and then freeze them. When the sauce is frozen, I dump the frozen disks into a freezer bag. When you are ready to make pizza, pull out what you need and put it back into a custard cup to thaw. With some preplanning, you can literally make your own pizza in the time it would take to have one delivered.

General guide to grilling pizzas

Just as a general guide to grilling pizzas, I'll outline the steps that we use. First, our grill is an infrared heat grill. It loses heat VERY quickly when the lid is opened. Your grill may behave totally differently and you may need more or less time. I don't have any experience grilling pizza on a charcoal grill, but I do know that you want hot coals, not flames, and that you probably need to build the fire on one side and leave one side 'cool'. The thickness of your pizza (both of the dough and the amount of toppings) will also affect the time needed.

Second, we don't have a pizza baking stone so we are cooking the dough directly on the grill grates. Baking stones work great if you have one, but of course, the pizza will brown without the grill marks. If you have access to a big comal over a wood burning fire, that would be perfect, too. Cooking the dough is not that different from cooking tortillas.

Pizza toppings ready to go
One of the keys to a good grilled pizza is to be organized. Prepare all of your topping ingredients and put them in little bowls (or big ones!) on a tray that you can carry outside. El Jefe keeps a small plastic squirt bottle (formerly for soy sauce) filled with oil for all of his grilling. It's much easier to get the quantity you need that way and you don't have to worry about dropping the bottle. Also put a brush for the olive oil, a big spoon to spread the pizza sauce, and tongs or a spatula on the tray. If your grill doesn't have a shelf, pull up a table or chair on which you can put the tray.

Preheat the grill on one side to its highest setting (15 minutes on our infrared gas grill). El Jefe usually turns the temperature down a notch at this point (from 'preheat' to 'sear' or medium-high). Slide the dough from the pizza peel or the back of a baking sheet directly onto the hot grates. Close the lid and grill for 2 to 4 minutes. If possible, peek in from an opening in the back to keep an eye on the dough's progress rather than opening the lid to check. When it is ready to turn, the top will not be browned but will show some 'firming up' and will look drier than the dough originally looked. You may see some big bubbles in the dough and that's okay. The bottom should be lightly browned with some nice dark brown grill marks.

Pick up the partially cooked dough with the peel, a big spatula, or your fingers (be careful!). Flip the crust over onto the "off" side of the grill and brush the top (formerly the bottom) with olive oil. The olive oil helps to prevent the sauce from making your dough soggy. Top with sauce and your other ingredients. We like to put a little cheese under the toppings and more on top of the toppings to 'glue' them down. Work quickly so that your grill doesn't cool off too much. Slide the topped pizza back over to the direct heat side and close the lid.

Pizza on the grill
Cannot get a good photo at night!
If you are making more than one pizza or your grill doesn't have more than one heat zone, you may find it more convenient to remove the crust to a pizza pan, a flat edged baking sheet, or a pizza peel, to top it at the table and then return it to the grill. We did that when we had a pizza party for nine people. We needed to keep the assembly line going and maintain the grill hot by keeping the lid closed, and, most importantly, we didn't want the kids to burn themselves on the grill while they were topping their pizzas. Kids love to make their own pizzas!

After topping the pizza, return it to the hot side of the grill and grill for another 2 to 4 minutes until the cheese is fully melted and the bottom of the crust is nicely browned. I love those grill marks on the crust! If the crust seems to be cooking too fast (overbrowning or grill marks too dark) turn the temperature down just a little. The second side could take a couple of minutes longer depending upon how much heat your grill lost during the topping and how thick your pizza is.

Farewell

Goodbye Pizza Hut, Domino's, and Toto's (our only choices in La Ceiba). It was nice knowing you before I discovered homemade grilled pizza. I doubt I'll ever see you again. Farewell. Sorry, but I have a better pizza than you!

Is my excitement contagious? Are you itching to try it? Before you jump in, please check out the next article, in which I'll give you some more tips and resources to boost your self-confidence and make you drool for grilled pizza.

Grilled pepperoni pizza
Pepperoni and peppers pizza

March 30, 2013

Good Honduran Honey

 Miel Coapíhl (Coapíhl Honey)
 Miel Coapíhl (Coapíhl Honey)

As you may remember, I make homemade yogurt* and I generally sweeten it with honey. I've been trying some different brands of honey and recently found one that is really good. The label mentioned that it is made in Siguatepeque, Comayagua, and that they had a website.

(Those are some hard words, aren't they? See-guah-teh-peck-ay, Ko-my-aug-wah. The map below shows its location in Honduras. Click to enlarge.)

Siguatepeque, Honduras
I checked out the Coapíhl website (in Spanish) and found out that it is a cooperative of around 100 small producers, including women. Coapíhl (Cooperativa Apícola Pionera de Honduras Limitada) was originally established in 1977. They began exporting products to Europe in 1985 and to the US in 2007.

Coapíhl offers technical assistance and free training to its associates, including training in how to make the equipment needed for apiculture (bee keeping).

With support from Heifer International Project HPI, the co-op has helped their associates to increase their productivity, improve their income, and help their families. Apicultue is often a family activity in which the entire family is involved.

Check out this heartwarming success story at Heifer's website. It brought tears to my eyes and it will to you also.

If you see Coapíhl 100% Miel de Abejas (Bee Honey) in your grocery store, try it out. I think you'll like it. If you don't see it, maybe you could ask your grocer if they can get it. You'll be helping Hondurans to help themselves.

~~~~~~~~~~~~~~~

*Does anyone know if Yogurt starter (culture) is available anywhere in Honduras?

January 30, 2013

Roasted pork leg, a Honduran favorite

Record breaking sales of pork, apples, and grapes

To show you how popular Christmas pork is in La Ceiba, this article in the local Ceibeño section of La Prensa reported that an estimated 72,000 pounds of pork were consumed by Ceibeños during Christmas week and that another 30,000 pounds were expected to be sold during New Year's week.

The other article reported that grapes and apples, other popular holiday food items, experienced a 30% increase in sales this year and a 15% increase in price compared to last year. I always thought the grape and apple tradition was odd given the wonderful tropical fruit available here, but maybe because they are both imported, that is why they are considered a special treat for the holidays. The article notes that grapes and apples are more in demand for Christmas, while tamales and torrejas (a donut-like dessert soaked in a sugar syrup) are more in demand for New Year.

The article notes that chicken is the more common fare for Ceibeños, though pork and beef are eaten year round, particularly in the form of pork chops (chuletas).

Below is a translation of my Honduran sister-in-law's recipe for roasted pork leg that she was kind enough to share with me the first time that I made one. I'm going to be so bold as to call it 'Honduran style' because it is, uh, from a Honduran living in Honduras, but I don't claim that there is only one Honduran style – anymore than there is one 'American style' chicken soup recipe. ;-) So if this isn't the way that your Honduran mother made it, please leave a comment to share other Honduran versions. I'd love to read about variations.

January 29, 2013

La Gringa's Roast Pork Leg Recipe

roasted pork leg recipe
Roasted Pork Leg – minus a few test bites by Chef El Jefe

I promised a roasted pork leg recipe and I'm not only providing you with the recipe I used this year, but also my sister-in-law's authentic Honduran recipe, as a well as a modified version of her recipe. Those latter two recipes will be in the next article. (I promise! Unfortunately, my sister-in-law's recipe was misplaced for a time, hence the delay in posting.)

Roasted pork leg leftovers
Leftovers
For my recipe version below, I winged it by picking and choosing what sounded good from three recipes I found online, since none of my cookbooks have a recipe for whole fresh pork leg. I was looking for a sort of Caribbean flavor and I think it was achieved with lots of garlic and fresh ginger, as well as the bitter orange juice. I can tell you that it was served to Hondurans and they all loved it. The proof is shown by how much they ate!

Because I was winging it, I ended up with about 1 1/2 cups of unused marinade. El Jefe loved the flavor so much that a week later he went out and bought a smaller pork roast to cook on the grill with the leftover marinade. The proportions of this recipe have been reduced so that you shouldn't have a lot of excess marinade. Before you start marinating the meat, in a separate bowl, set aside about 1/3-1/2 cup for basting in the first couple of hours. After that, there should be enough pan juices to use for basting during the rest of the cooking time.

Speaking of cooking time, please use a thermometer and your own judgement. The USDA has lowered the recommended 'safe' cooking temperature for pork from 160ºF down to 145ºF with a 3-minute resting time, but remember that a pork leg is a huge hunk of meat with a large bone running through it so the temperature is going to vary a lot in different areas of the meat. While trichinosis has been mostly eliminated in the US, I have no idea the status in Honduras so I'd rather play it safe like Hondurans do. Knowing that most of my guests would have been appalled at pink meat, I preferred to ensure that the leg was fully cooked and tender.

January 1, 2013

New Year's Day Lucky Blackeye Pea Soup Recipe

Lucky Blackeye Pea Soup for New Year's
New Year's Day Blackeye Pea Soup
It brings luck!


There is a tradition in Texas that if you eat Blackeye Pea Soup on New Year's Day, you'll have good luck all year. Once I got started, I got all superstitious about it and couldn't quit. I was never a big fan of blackeyed peas, but I enjoyed this soup most every New Year's Day. When I first came to La Ceiba, it was dry red beans or canned black beans or nothing, but over the years, the variety of available beans has grown and we can get several kinds of beans and lentils now, mostly of the Goya brand.

Goya Balckeye Peas
When did a pound become 14 ounces?
I used to make this soup with smoked ham hocks which gave it a nice smokey flavor. Then I discovered Andouille sausage, which I absolutely love. The flavor goes very well with blackeye peas but we can't get either one here and I don't much like (or trust) Honduran sausage, having heard some bad stories. So trying to think of something to make a bean soup satisfying to my meat-lovin' husband, I decided to try plain, unsmoked pork hocks. El Jefe got a butcher to cut them but there was virtually no meat at all on them. Then J somehow left the bag of hocks out of the fridge all night. Yuck. I discovered them in the morning and the smell was off so out they went.

smoked pork chops and veggies
Smoked pork chops
El Jefe was desperate for meat in his soup. The only smoked meat I've seen is expensive imported hams or smoked pork chops so I said to go buy a couple of those if he had to have meat and I'd cut them up and add them to the soup. He came home with five pork chops, so... "Now we are having meat soup with beans!", I complained. Heheheh! Hondurans love their meat!

December 28, 2012

Our Honduran Christmas Eve

Roasted fresh pork leg
after its rest, just before carving
(that little flap of fat at the bottom makes this look like a giant turtle!)

Our main celebration was Christmas Eve, which El Jefe tells me is the Honduran traditional day to really celebrate, at least in his family. That's a time when people go to visit friends and family, who always have plenty of food on hand for expected or unexpected visitors. Christmas Day is similar, but more for family and more laid back.

Tamales are especially popular at Christmas time. A big bag of tamales in the fridge can be used for breakfast, lunch or dinner, or for those drop-in guests, often accompanied by a pork or chicken sandwich. I didn't make any tamales this year but I've been promising to post my Honduran tamale recipe for years and I really need to do that soon. We did get some from my sister-in-law and some from my mother-in-law so we weren't completely tamale deprived.

Unlike the US, presents aren't a big part of Christmas, especially among the poor and struggling. Children whose parents can afford it generally get a new outfit of clothes and they are as excited and happy to get that as US kids are to find dozens of toys under the tree. Christmas has probably been a lot more commercialized for the middle and upper classes because the newspapers are often more than an inch thick during December with all the ads for toys, clothes, appliances, and electronics.

El Jefe and I seem to rotate our traditional foods with one year having American style roast turkey with all the trimmings and the next the traditional fresh pork leg served as sandwiches. Since we recently barbecued a turkey breast, this was a roasted pork leg year. I was excited to make it, but not half as excited as J was. This was the third time I've made a pork leg. The first time I used/modified my sister-in-law's recipe. The second time was a boneless leg because that is all we could find. On that one, I modified the marinade further. Both were good, but I wanted to do something slightly different this time. My cookbooks didn't have any recipes for whole fresh pork leg so I searched for recipes on the internet. I settled on three different recipes that sounded good, one was a Martha Stewart, one was a Cuban style, and I forget the other one. I took a little of each to come up with my recipe, which I think I would call a bit of a Caribbean style. Pork legs are easy to do; they just take a loooong time.

June 13, 2012

The sourdough starter

Sourdough starter, La Ceiba, Honduras
Bubbling — this is what you want to see!

I was never good at science, so I'll put this in the simplest terms as I understand the process. Initially when you begin making your batch of sourdough starter, the 'good' and 'bad' bacterias develop at different rates. After the first few days, the 'bad' bacteria seems to be winning the battle and they can make their presence known by a foul odor. I guess that is one of the points where I used to give up in the past.

Sourdough starter 1, La Ceiba, Honduras
Starter risen to 300 ml. at 10:50 am
[The photos included here show the progression of a half cup of starter (about 125 ml.) fed at around 10:30 am with flour and water to equal a total mix of a little more than a cup (250 ml.). In this photo, it has risen to about 300 ml. in the first 20 minutes. Ultimately, it rose to a little over 500 ml. and then started falling. At the point when it starts falling is when you can use it in a recipe.]

Developing a strong, healthy starter takes a minimum of a week but two weeks of fermentation at room temperature is probably necessary for the best flavor. The looks that I and my little science experiment got from Arexy and El Jefe were priceless. Arexy only allowed herself the doubting 'raised eyebrow' looks, but El Jefe was more vocal, with comments such as "You're stinking up the whole house with that crap!" and "How long are you going to be doing that?!" It's true, the starter went through a couple of days of really smelling bad! I wasn't 100% confident in my experiment, but I tried to convince him that it would be worth it in the long run.

June 10, 2012

Honduran sourdough bread

Honduran sourdough bread
Looks like it came from a bakery, doesn't it?

One thing that I really missed when I first came to Honduras was good, chewy bread so I've made most of our bread since we moved here. I'm sure Hondurans feel the same way about homemade tortillas when they move to another country. One of my favorite breads comes from a King Arthur Flour recipe for a rustic artisan bread, but since it requires planning in advance to make a 'poolish' the day before, I found that I had gotten into a rut making an easy Italian loaf. It was good, but not spectacular.

Honduran sourdough bread
A different batch of bread
I've experimented with trying to make sourdough starter over the years back in the US and here in Honduras. I always gave up and ended up throwing it out because it looked or smelled so nasty that I was afraid to use it. After doing a lot of online research, I finally found a starter recipe that worked for me! I have been making real sourdough bread for a couple of months now and it is so far above and beyond regular bread that there is no comparison. El Jefe is crazy over it, too. Sourdough bread has a crispy, crunchy crust and soft, but chewy interior like no other.

August 17, 2011

Shrimp Kebabs (Pinchos de camarones)

Shrimp pinchos (kebabs)
Shrimp Kebabs (Pinchos de camarones)

Whether you call them kebobs, kabobs, kababs, shish kebab, brochettes, or pinchos as they are called in La Ceiba, Honduras, meat on a stick is an easy and quick, but impressive meal. Pinchos of beef, chicken or shrimp are a popular restaurant meal in La Ceiba and are simple to make at home, too, either by grilling outdoors or broiling in the oven. The variations are endless with any type of meat, vegetables, and flavorings. Oh, to add one more name to the list, one former restaurant in La Ceiba called them 'alambres' (wires) referring to the skewer. If you don't have access to your own kitchen, I recommend the pinchos at Expatriates Restaurant here in La Ceiba.

El Jefe would opt for beef any day but one of the many nice things about pinchos is that it isn't such a big deal to prepare more than one type of meat in the same meal. My personal favorites are chicken or shrimp, especially when I can combine them with fresh pineapple and lots of chiles.

As one of the Blogicito commenters mentioned recently, the local La Ceiba pineapples have been just out of this world in rich flavor during the past few months. I always love fresh pineapple but apparently the weather has been absolutely perfect lately for developing sweet, juicy, flavorful pineapples. No matter how green or yellow, how big or small, all have been outstanding.

You can assemble pinchos in advance and marinade them for an hour or so or even longer if necessary to help tenderize beef. Or just marinade the meat separately and assemble later. Be careful with shrimp, though, that you don't marinade them in anything that works as a tenderizer or you'll end up with super mushy shrimp. I made that mistake once with pineapple and shrimp appetizers, so to be safe, El Jefe insisted that the pineapple be on separate sticks. Since we were cooking them immediately, I don't think that it was really necessary, but, you know, he's the boss. ;-)

I like pinchos for parties because depending upon the crowd, people can prepare their own with the ingredients they like best. There are usually some who enjoy the cooking especially when it is outside on the grill — man territory. I think it is fun and it's good to take the pressure off the ladies for a change.

Here is a tip I learned from Martha Stewart: If you use wooden sticks, soak them in water for an hour or two prior to assembling the kabobs to prevent the tips from catching on fire. Here is a tip I learned from Gordon whats-his-name, the British chef/restaurant saver: Never reuse wooden sticks. Throw them out as they could contain bacteria and he might have to come and close down your kitchen.

These shrimp pinchos included chiles, onions, and tomatoes, just what we happened to have on hand. Since it only takes about 5-7 minutes to cook the shrimp, you wouldn't want to use any vegetables that need a longer cooking time. El Jefe had more onions on his pincho, but he thought the onions had a too-raw taste. The next time, I think I'll saute the onion pieces for a couple of minutes before assembling the pinchos. I've done that in the past, but didn't think about it this time.

Here is the 'secret' marinade I used: Lee Kum Kee Marinada de Pollo Teriyaki, available at most of the grocery stores in La Ceiba. I use this a lot, straight out of the bottle, including for Tex-Mex chicken or beef fajitas! I discovered it one of the first times I tried to make fajitas in Honduras and of course didn't have my favorite smoky fajita marinade from Texas. Out of desperation to pump up the flavor, I tried some of this marinade (Chinese-Tex-Mex?). It was surprisingly good, and surprisingly not so oriental-flavored as I expected. Just go easy on the salt in your recipe as this packs a heaping serving of salt.

We served the pinchos with steamed jasmine rice (YUM — what aroma and flavor!), and since we can never get enough pineapple, a fruit salad.

While the pineapples are at their peak, other recipes you might enjoy:

Pork and pineapple with chiles, garlic, and ginger

La Gringa's fresh pineapple ice cream recipe

March 16, 2011

Progress? I think not

machine made corn tortillaMachine made tortilla

Some of the restaurants in town are now serving these machine made corn tortillas. All are perfectly round, exactly the same portion, perfectly formed, and perfectly tasteless.

I'm all for progress and have more than my share of kitchen gadgets and machines. I realize that tortillas are labor intensive and time consuming to make by hand. But....made by hand is how they must be!


handmade corn tortilla
Now these are real tortillas, lovingly made by the hand of Arexy. Personally, I prefer flour tortillas, but hot-off-the-stove, I'll take a couple of these with my beans and rice any day. These tortillas have color. They have character. They have texture. But most of all they have flavor. Comparing these tortillas to the machine made is like comparing a hot, crusty San Francisco sourdough to a week-old bag of Wonder bread.

I really don't like seeing this trend to machine tortillas in La Ceiba.

Progress is not always a good thing.

March 10, 2011

Blueberry cheesecake ice cream

La Gringa's Blueberry cheesecake ice cream
La Gringa's blueberry cheesecake ice cream with graham cracker crust bits.

Berry good.

October 27, 2010

Guest Blog: Cola Country

Typical Honduran restaurant plateTypical BBQ restaurant plate

The following is a guest blog from a reader concerned about typical eating habits in Honduras:

Cola Country
by Rudi Kerkmann

The state of health of people is in great part dependent on what they eat or if they exercise. What they eat and drink also to a great extent is dependent on their knowledge of nutrition, their customs, buying power, and will power. Meals need to be balanced with the proper amount of proteins 30%, carbohydrates 40%' and healthy fats 30%. Carbohydrates should be mostly low density vegetables and fruits and some whole grain products. The proteins should be, low fat meat and dairy products, and fish.

How unfortunate it is that in Honduras, often people do not have enough money to buy healthy food and are enticed by relentless advertising to buy food which is unhealthy, processed, and has a great amount of sodium, chemicals, and sugar to prolong their shelf life and make them taste good. This food is imported from many countries in the world. These food chains do not care about customer's health; it is all about increasing their sales and it is all about money.

Hondurans are not used to eating vegetables. I notice that people like to eat fried food and also barbecued meat; both are unhealthy. It is much better to buy healthy fresh food which should include a great deal of vegetables and fruits, instead of processed food.

One time I had to wait near a 'pulperia' in the morning and it was sad to see what people buy for breakfast: a bottle of cola and a bag of sweet bread or chips. Some even bought a carton of orange juice which is also not healthy, as it contains many chemicals and sugar. These people do not know the damage they are doing to themselves or perhaps they do not care about it. It is possible to buy 15 to 20 oranges or more for the price of one litter of cola. Chips have a high content of bad fat and other unhealthy ingredients. I see a lot of chips being eaten in Honduras.

I know that many working Hondurans have the custom to rely for their lunch on restaurant take-out or a food stand nearby and it takes too much money out of their pay check. How much healthier would it be to prepare at home a big bowl of salad with tomatoes, green pepper, onions, etc. with a tablespoon of olive oil and apple or balsamic vinegar, accompanied with a piece of chicken or low fat cheese or fish, no more than two tortillas and perhaps a piece of corn. Always eat a piece of fruit or banana after lunch. Drink water, pure fruit juice, or green tea instead of cola or similar sugary drinks.

We all know already that almost all food served in fast food outlets is unhealthy. The upper and middle class have absolutely no excuse not to eat healthy and should eat more unprocessed vegetables and fruits. The fact that there are many people overweight is proof that they do not eat correctly and do not exercise. I think Hondurans are addicted to cola and soda drinks. It will take a great effort to live healthy so that they become less dependent on drugs and medical services.

Many healthy foods are grown in Honduras. If people insist on drinking colas and eating chips or other processed foods, they will get sick sooner or later. It makes me sad to see people lining up in drug stores to buy medicines for high blood pressure or high cholesterol. In most cases, all they need to do is to change their lifestyle by eating differently and exercising. It is much faster and convenient for medical doctors to write out a prescription than to explain how to eat different foods and exercise. Unfortunately these days, medical doctors have been mostly trained to relieve the symptoms, rather than to work towards prevention of illnesses, and many people think there is pill or a surgery for all sicknesses.


Honduras is not able to provide good health care to people who cannot afford private health care. Like in many other countries, Honduras would not have to spend enormous amounts of money on health care if the emphasis would be on prevention rather than on the treatment of sicknesses. As the old saying goes, "An ounce of prevention is worth more than a pound of cure". Lack of prevention drains the amount of resources which would be better spent on infrastructure, school and factories.

People who eat healthy food and exercise and are very moderate with alcohol consumption, (one glass of wine or equivalent a day, for woman and two for a man is recommended) and do not smoke, will rarely ever become sick. Also, of course, exercise is important. You must walk thirty minutes or, better still, one hour everyday and do some weight lifting three times a week if you have the opportunity. It is never too late to start a healthy life style. Why spend a lot of money on medical services, drugs, etc. when all you have to do is eat healthy and exercise? The total amount of money saved in Honduras, by eliminating unnecessary expenses in health care (by changing their lifestyle) can be used for productive purposes, and would go a long way to make Honduras a better and healthier country.

This article is by no means comprehensive, but rather is meant to inspire you to get more knowledge by reading a health book and articles about health which can be found by searching the internet. If you stay healthy, you do yourself and Honduras a great favour.


About the author:
Rudi Kerkmann is a trilingual full-time pensioner married to a bilingual Honduran woman for more than 30 years. They have lived in Honduras part of each year for the past 10 years and feel that they have fully integrated into the life in Honduras. They would love to see a Honduras more educated towards healthier and simple food habits.

Rudi invites your comments on his article.

October 11, 2010

What were they thinking?


Gross! What is it?


Frijolitos/Refried beans
I actually like these frijolitos (refried beans). They aren't bad at all and it's handy to have a package in the pantry for a quick meal. We always make our own beans, but since — I calmly mention — we have been without running water for 21 days, I haven't been inclined to do much cooking. (It's a good excuse anyway.) We've eaten a lot of baleadas. Not that I mind. I love baleadas and could eat them just about every day. A hot flour tortilla, a smear of beans, a little cheese and you're good to go.

But, what were they thinking with that photo?! Spread the frijolitos on a tortilla, make a little pile on a plate with other food, show a happy face eating a baleada or burrito, anything would be better than this turd on a plate photo!
Older posts
Home

Related Posts Plugin for WordPress, Blogger...