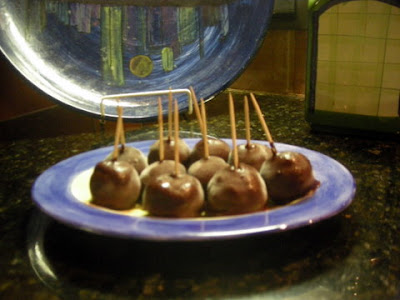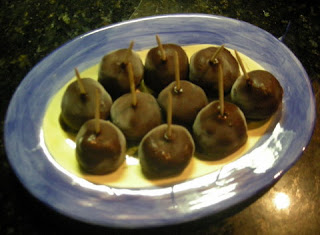
A month or so ago, I was looking for something on the internet, which led to something totally unrelated, which led to something else (Cake Pops), and then I stumbled upon Oreo Pops.
Maybe this is old news to those of you in the USA, but "Cake Pops" were something new to me. They are little dessert treats on a stick, like a sucker, and some talented people decorate them like you wouldn't believe! Cartoon characters, Santa Claus, animals, flowers, you name it (click for photos). It sounded like something fun but since I couldn't find sucker sticks or fancy decorating ingredients in La Ceiba and didn't feel like baking a cake, I decided to make Oreo Pops, or more accurately called Oreo Bites since I had to use toothpicks.
I had reservations as I thought these might be a little too sweet for my taste since the white Oreo filling is mixed in as well. Not so. They had a deep, rich chocolate flavor that wasn't overly sweet. The final texture is kind of like fudge, but not as sweet as fudge generally is. El Jefe liked them, too.
This is a great recipe for Honduras, especially for those of us not in the mega shopping areas, since it only has three ingredients: Oreos, cream cheese (which has been readily available in La Ceiba for several years now), and chocolate. I think it would also be a fun recipe for kids to make.
makes about 30-36
1 16 oz. bag of Oreos
1 8 oz. package of cream cheese
4-5 oz. semisweet, milk, or white chocolate*
*I used Bakers Semisweet squares, but you could use chocolate chips or Dove chocolate candies if you can find them, or even use plain chocolate candy bars if your selection of chocolate is limited. You could also use a little of two kinds of chocolate and drizzle a design of white chocolate over a semi-sweet coating or vice versa.
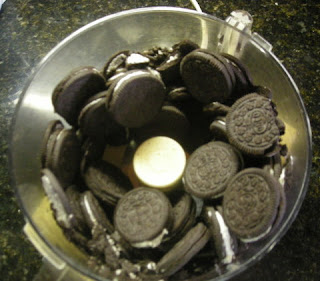
 If you have a food processor, dump all of the Oreos in it and let 'er rip until the Oreos are fine crumbs.
If you don't have a machine, put the cookies a few at a time into a heavy sealable plastic bag and either using a rolling pin or your kitchen rock (you do have one, right?), and smash until the cookies are in fine crumbs. Place the crumbs into a medium-sized bowl. It looks a little like potting soil at this point.
 Add 4-6 oz. of the cream cheese and run the machine for a few seconds at a time until the mixture begins to pull into a well-mixed ball. Or, if you aren't using a machine, mix in the cream cheese with a big spoon, spatula, or your hands, part at a time, until the "dough" is firm and will agreeably roll into a cohesive ball. Add more, a couple of ounces at a time, as needed. I only used about 6 oz. total, though most recipes call for the whole 8 oz. You want the mix to be about play dough consistency. Too soft and your balls will flatten out, too dry and your balls will crumble.
 Pinch off an amount to make about a 1 to 1 1/4 inch ball. If I had sucker sticks, I would make them bigger. Roll the dough in your hands until it is a nice round shape. Place the balls on a wax paper lined cookie sheet and put it in the freezer for 15-30 minutes.
Melt your chocolate carefully in the microwave or rig up a "double boiler" with a bowl and a small pot. I like the double boiler so I could keep the chocolate warm for dipping. As it cools, it thickens and that isn't great for dipping.
 Side Note: I've been having problems with chocolate seizing (getting hard and never melting in the microwave) lately — all the time! I don't know if it is the quality of the chocolate (note the photo, this chocolate has been melted in transit at least once and apparently stored under less than optimal conditions) or if it is just from the high humidity in the air. If you use a double boiler, be sure that no boiling water spatters into your chocolate as it will definitely seize.
 If your chocolate seizes or seems too thick for dipping, stir in a teaspoon or two of shortening or manteca to thin it out a bit. Don't use butter — it will melt later. This time my chocolate did seize as you can see in the small bowl to the side. I tried to melt the congealed mass over the stove with no joy, so I added a bit of shortening, and a bit more, and a bit more, until it finally got to the right consistency. Though I wouldn't purposely add that much shortening if I had a choice, the finally taste really didn't suffer.
 When the balls are firm and the chocolate is melted, take a toothpick, dip the end into the chocolate and then insert it into a ball. The chocolate is supposed to help keep the toothpick from falling out of the ball and it seemed to work. I never lost a single one.
Holding the toothpick vertical, plunge the ball completely into the melted chocolate to coat it thoroughly. I used a spoon in the other hand to help the chocolate cover completely and the back of spoon to scrape some of the excess off the bottom, but work fast as the chocolate will look messy if you play with it after it starts to cool. Do this one by one and place the chocolate covered balls back on to the wax paper (foil might work, too), but definitely do not place them on a plate as the chocolate will stick like glue.
If you find the balls are getting soft before you finish, put them back into the freezer for a few minutes to firm up again before dipping the rest.
Chill in the freezer until the chocolate is firm and enjoy! I'll bet you can't eat just one.
 Another note: Most recipes for Cake Balls say to not store them in the refrigerator because the chocolate will 'weep' (form condensation on the outside). Here in the tropics, the chocolate would melt if I stored them at room temperature, so I stored the Oreo Balls in the freezer. I just put some on a plate and let them thaw for a few minutes before serving.
Question: Have any of you in the tropics had problems with chocolate seizing when there has been no chance of moisture being introduced by the cook? I melted many a chocolate in my previous air-conditioned kitchens and never had this problem before. Now I have the problem almost every time and I'd like to try to pinpoint what the issue is.
As always, please let me know if you try the recipe and how you liked it. ;-)


 Welcome to my Blogicito —


